Browsing "Older Posts"

» Search results for video editing

Top 5 Tricks To Edit Videos Online

By Ashutosh Jha → Tuesday, August 6, 2019
Editing is ordinarily the last procedure that occurs before a video gets to you for the final survey. You will realize it tends to be a tedious procedure when you have to make a video for your own project. When you get all the editing types in control and realize why everyone is significant in various conditions, you can make your ventures more engaging and your editing will increasingly be effective.

You can make an entire editing style of your own that mirrors your innovative side. On the whole, you need to learn them.

In case you're simply getting into the editing altering game, you might be confounded regarding how to manage the huge number of clips you have. No worries. Today we will write about the top 5 tricks and tips that will surely help you with your online video editing journey. Not sure yet? Okay, let's get into them.

5 Best Online Video Editing Tips to Follow

Let's start and look for some of the best online video editing tips to follow. These tips will help you create some amazing videos for your use. These online video editing tips will help you creating professional videos without spending much budget on it.

#1 Choosing the weapon can be tricky

Your choice of video editing tool will largely depend on your control. Windows Movie Maker, iMovie and these types of other basic tools will just be fine if your goal is to toss a couple of clasps together and after that include a few titles.

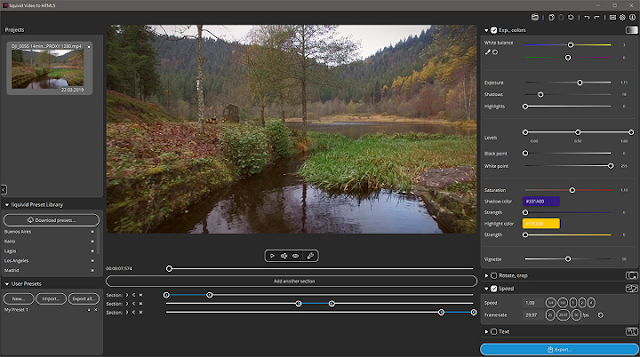
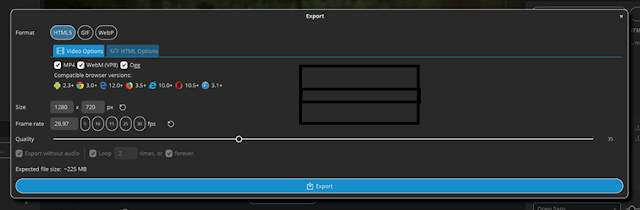
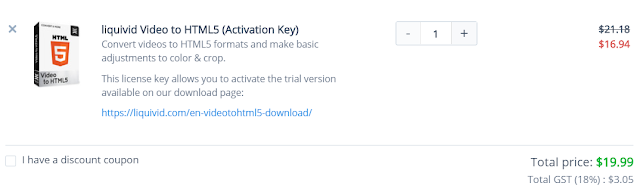
Further Reading: How to convert video to HTML5

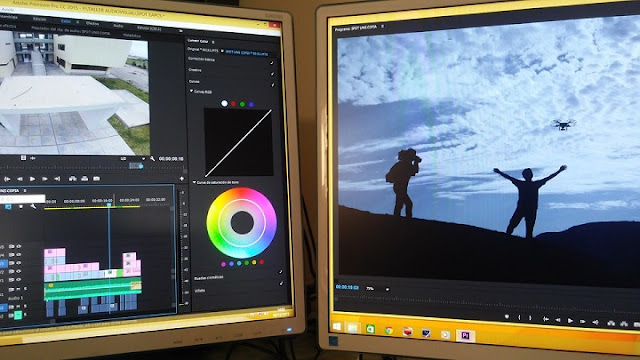
On the off chance that you need something somewhat more unpredictable that enables you to layer recordings like Photoshop and make use of keyboard shortcuts… well, at that point the Adobe Premiere Pro will be a decent pick. People are using it as it is the latest tool with many features available.

Remember that there's an expectation to absorb information to these editors. Now and again it's great to begin in an initial prosumer editor, similar to Adobe Premiere Elements, Sony Vegas, or Final Cut Pro X, first.

#2 Trip the unnecessary clips

What most beginners fo is, they toss footage on their timeline and call it a day. But it’s really stupid. You should always trim the start and the finish of your footages so that your entire video remains clean. Also, look for the “hot” scene before adding it. Nobody wants to sit around idly watching an open field before the activity occurs, so become accustomed to editing compactly for your group of spectators' advantage.

#3 Keep backup for everything

Many people get short of memory cards and hard drives. It’s just common sense to keep a copy as in backup for everything and keep it in a separate location. You can also utilize cloud storage but keep in mind that it takes a lot of time in the case of videos. In every case, it’s the best idea to keep a duplicate of your task catalog on your PC and on a different hard drive elsewhere.

At the point when the task is finished, and you need to keep a document of everything, keep the records on one more hard drive and erase things off your fundamental PC. Your hard drives may never fall flat, yet if they do, it will be justified, despite all the trouble.

Also, it’s important to maintain a directory especially when you’re maintaining a big project. Throwing everything onto your desktop and expecting for the best won’t just do the work for you. Creating something called "project directory" is as vital as ever. It’s very simple to create a folder. Then why don’t you do that?

#4 Avoid Jumpcuts

It’s very normal when you shoot interviews and the interviewee gets out of words and starts mumbling like "uh" and "um" and all other breath is a total hassle. Filming interviews where the interviewee constantly says "um" and "uh" every other breath is a total hassle. Fortunately, you can remove these and after that layer additional video clasps of shots relating to the substance over these ungainly minutes. It helps to make things look perfect without any hitch once it’s done carefully. Remember that you'll require a further developed editing framework for utilizing something like Adobe Premiere or Final Cut. Prosumer editors consider video layering, yet iMovie won't.

#5 Vary the shots along with a story

Another significant interesting point while editing is to keep your content outwardly fascinating. As opposed to simply utilizing a similar shot for the whole video, attempt to shift things up with all the more fascinating points. This can be something as basic as shooting your meeting with two cameras and exchanging between them (another approach to hide those "uhs" and "ums").

A story is the most significant thing in a video. You always have to come up with a story with a beginning, a middle, and an end. If you want to be the best editor, you have to be the best storyteller first. It’s totally nonsense to have a bunch of random shots with no concept in the background. A story will bring the structure in your video and will help you to become the highest-paid editor among your competitors.

Editing can be daunting at first but once you get the hook of it, you can ultimately master it. Without editing, you just can't reach the highest goal of your success. Patience -lays a great role in this matter because you can’t get all those fancy cuts and moves within no time. So, it will take time and you need to keep on your practices. As time goes on, you will get better and better.

iSkySoft Video Editor: Easy to Use Video Editing Tool for Mac

By Ashutosh Jha → Saturday, June 13, 2015
Choosing a video editor software has never been so easy task. There are so many softwares available in the market in both free and paid category. Almost all the softwares are having common basic features like cutting, splitting, adding effects etc. The user experience might be different but functionalities are almost same. But if you are in business like Video Marketer, Bloggers etc. then you need more features.

best-video-editor-tool

People are making thousands of dollars every month from video marketing but they not only use the basic features but some tricks as well. And that is the difference between common marketer and pro. But generally the video editors those provide advanced features are hard to use. So today I am going to talk about a video editor which provides great functionality and most importantly this is very easy to use.

If you are looking for an easy to use video editor with great functionality and at affordable price then you must try iSkySoft video editor.

Features of iSkySoft Video Editor

This video editor is very easy to use and any one can start editing video using this tool. There are so many features of it. Below I am going to list few main features of iSkySoft Video editor-

• This software lets you combine video, audio and photos and turns them into a movie effectively.
• Add different transition effects inside the video which makes it more powerful.
• It supports files having both 4:3 and 16:9 aspect ratio
• All types of audios, videos, pictures and other graphics are supported by iSkySoft video editor.
• Includes a set of handy editing tools like split, merge, trim, rotate, crop, effect and so forth, allowing you to make whatever edits you like: rotate videos taken with camera held sideways, crop the black sides, etc.

• It allows you to upload your masterpiece to YouTube.com right from the program interface. You can also export to iDevices, HTML or almost any other video format you like.

How to Use iSkySoft Video Editor for Mac

First download the iSkySoft video editor for Mac and install. Don’t worry you can download this for free as a trial. Later if you’ll like this you can buy the full license.

As discussed above, iSkySoft is a complete video editing tool which is having all the basic and advanced features. Let me take you to the few easy steps using which you can make a movie.

1. Import Media File:
Open iSkySoft video editor and click on file and open your existing project. In the primary window, drag the media files from the resource browser window to the storyboard at bottom.

iskysoft-video-editor

2. Add Transition and/or Intro/Credit Screens:
All the imported video clips that you have taken from step 1 will join together one by one without transition by default. To make it switch more smoothly, you can easily drag and drop a transition from the above Transition tab to the area between two clips.

iskysoft-video-editor

Now adjust the video and add the effects as per your need. For photo, you're also able to add motion to make it pan or zoom in/out.

For background music, trimming and audio adjustment tools are offered.

3. Preview and Share
Now once you’re done with editing video, you can click to preview and export it if you are satisfied.

iskysoft-video-editor

To save your video, click the Export button at the right, and keep your name and select format and save.


Pricing


iSkySoft video editor for Mac is available just for $39.95. Also, you can download the free version of this video editor and enjoy your trial period.

Pros and Cons of iSkySoft Video Editor


This video editor has lots of positive features; few of those are below-
• Interactive interface and ease to use.
• Includes all basic and advanced video editing tools.
• Broad input and sharing formats (YouTube, iDevices, HTML5, and more).
• Less price
• Awesome after sales support.

Though I didn’t find any major negative thing about iSkySoft, the one I realized can be-
• The trial version will have water mark of the company on the output video.

Over to You

If you’re all set to start video marketing or just want to make a good video for your use then iSkySoft can be a best option. Do try their trial offer and if you’ll find beneficial you can get upgraded any time.

Are you using any such video editor? Do let me know in comments.

VSDC Review: Free Video Editor for Windows

By Ashutosh Jha → Thursday, May 4, 2017
Today videos are no longer used for entertainment only. They are considered leading marketing material to create a special connection with potential customers. And with YouTube being the second largest search engine in the world, businesses should focus on video marketing more than before.

I have personally seen many people debating whether to invest into professional video editing - be it advanced software or a video editing freelancer. Production often costs somewhere between $500 and $1k, so for small businesses that may become a financial issue.

Good news. I have come across one free video editing software and it is named VSDC. It is an alternative to overpriced video editing software and can save you a good amount of money if you are ready to invest some time to master the tool. In this article, I'll briefly review VSDC and show how to start using it.

VSDC Free Video Editor Review

VSDC free video editor is a non-linear tool. It is a product of a software development company named Flash-Integro. They major at multimedia software development and have such industry-leading products as a video editor, audio editor, and video converter. VSDC Video Editor is one of the top pieces of free video editing software on the market and you are likely to see it among the top search engine results.

Download and Installation

To get started with VSDC free video editor, download it from their website for free and proceed with installation just as with any other software.

The best thing about the product is, it is completely free with no ads, watermarks or trial periods. VSDC offers rich functionality and yet has a simple and intuitive interface, allowing you to create videos with a bare minimum of efforts.

Supported Multimedia

The VSDC free video editor software supports most audio, video, and image file formats. Here are the most popular supported multimedia formats:

Video: AVI, MP4, MKV, MPG, WMV, 3GP, FLV
Audio: MP3, WAV, WMA, FLAC, PCM, OGG, AAC, M4A, AMR
Image: BMP, JPG, PNG, PSD, ICO, TIFF, etc.

Visual Effects

VSDC has a great choice of visual effects applicable to both - videos and images. From quick Instagram-like filters to advanced color correction tools - you get everything you might need to enhance your footage.

What's important - the software is being constantly updated several times per year. For instance, in a recently released version, VSDC developers added such artistic effects as Oil Paint (similar to Prisma's), Smoke, Black&White and Sepia. The last two are perfect for creating and old movie effect.

The number of blending modes VSDC offers is quite impressive too, and if you are looking for a more professional look for your project - you should definitely check them out.

System Requirements

There are no specific requirements for this software, and you can run it on a regular Windows PC. Here is the information provided on the website:

  • Operating system: Microsoft Windows XP SP3 / Vista / Win7 / Win8 / Win10
  • Intel, AMD or compatible processor with the working frequency at 1.5 GHz or higher
  • Screen resolution: 1024x768 pixels with 16-bit color or higher
  • RAM 256Mb for the program
  • Microsoft DirectX 9.0с or higher
  • At least 50 MB of free disk space
  • The installation and activation of the program require Administrator permissions
  • An Internet connection is required to activate the paid version of the program

How to Edit Footage Using VSDC Free Video Editor: Process Overview

Here are the simple steps you should follow to edit any video using VSDC free video editor. Once you run the program, you'll see options to either create a new project or perform screen/video capture. I've proceeded with the video editor, and here is how a fragment looks when added to the timeline.

Next, you can play with the video effects menu. Choose filters, transitions, transformations or Special FX - according to what you are working on.


Use the audio option to add the audio in the file. You can add audio from the tab shown here. You'll be able to apply audio effects and filters in VSDC as well.


Once you finish, you can export the video in almost any format and adjust quality settings according to your goals. For user convenience, VSDC has multiple export profiles with pre-configured quality settings. Simply choose the device your video will be watched on, and proceed with conversion, as it is shown below.


If you are planning to upload your video to social networks - such as YouTube, Vimeo, Facebook, Twitter or Instagram - choose "Web" and apply social media export profiles.

Wrapping Up

Once you start experimenting with VSDC, you'll see how many creative opportunities to work with a video it offers for free. Check out this video below to have a better picture of what the program looks like at first glance and download VSDC Free Video Editor if you are a Windows user.

How To Convert Video To HTML5?

By Ashutosh Jha → Tuesday, June 25, 2019
Remember the days when we used to upload the entire video on your web page to show it?

But now with the help of the latest version of HTML, HTML5, we can simply embed the code and add any video without actually uploading it to the server.

How To Convert Video To HTML5?
Also, the advanced multimedia feature of HTML5 avoids the need for using the adobe flash player. And so, you don’t have to think about whether the user is having any external tools or not. The native HTML5 video player also supports all the devices including laptop, desktop, mobile phones, and tablets to consider. It’s not that HTML5 covers all kind of videos but there are some limitations.

For example, HTML5 supports only the following format- OGG, MP4, and WebM of videos. And so, if your video is in some other format that should be converted into the allowed format. Also, it supports only H.264 encoder that means again if you got any other encoding then that needs to be converted to the allowed format.

So, if you are thinking to use any video on your website then you need to convert video to HTML5 first and then use. In the next section, I am going to share how to convert video to HTML5 free.

How to convert video to HTML5 free?

To convert video to HTML5, I am going to use one tool from the company named Liquivid. Liquivid is currently the leader in the market of this segment and allows the smooth video to HTML5 conversion for free.

What is Liquivid?

Liquivid is a video editing software making the editing and using the video easy. They create tools that combine different features which makes videos and photos editing easy and fun. There are different products shared by Liquivid which works for a different purpose. All the products are available for MAC and Windows PCs. All the products are also available for a free trial.

#1 Easy Cinemagraph- Here you can create cinemagraphs from the videos. This is quite helpful for running ads online
#2 Video Improve- This tool helps you improve the photos and videos with minimal efforts possible.
#3 Video to HTML5- This is the tool which we’re going to talk today. It makes videos to be used on the web
#4 Icon Effects- This is the new product introduced by the company where you can recolor, animate, and make the image transparent

Apart from all these major products by Liquivid, there are many tiny tools that Liquivid offers-

How to use Liquivids’s Video to HTML5 Converter

Using the tool is really simple and anyone can easily do that. The best thing about Liquivid’s tools are those are pretty easy to use. And so, if you are looking to add videos on your own website by hosting it on your own server, this is the solution.

Just follow the below steps to download, install, and use the tool.

Step-1: Download convert videos to HTML5 formats tool from the link given.

This will take you to another page where you can download the software depending on the operating system you have. The size of the software is around 90MB for windows and 100MB for MAC systems.
Step-2: Once downloaded, you can simply install it like you install any other windows software.

Step-3: Once the tool is installed, open it and you will find an interface where you will be able to convert video to HTML5. Here you can browse/add the video which you want to convert to HTML5.

There are many filters also which you can apply to adjust some argument of it like color, zoom, etc.

Step-4: Once done, simply click on export and you will be shown different option in which you may want to export.

Step-5: Just copy this HTML code and add it in any of your web pages to show it

Features of the tool

There are many features of this video to HTML5 tool which makes the conversion and using process quite easier. Here are some of the major features which you may want to check out-


  • Fast process while making HTML5 from videos
  • You can convert videos to images as well in the following format- GIF and WebP
  • Multiple customizations can be done in terms of adjusting resolution, frame rate, and output quality to reduce the file size
  • Customization can also be done on white balance, exposure, colors and more
  • You can rotate the videos, crop it with different aspect ratio and can also add text on it
  • Basic video editing like cutting, cropping, and combining the clips are also possible
  • Available for both the major OS- Windows and MAC
  • Very easy to use and quick guides are also available


System Requirements:

Although nothing special is required to use this video to HTML5 converter but it’s good to look at these before starting-


  • Windows 7 (or later), x64, 4GB RAM (8GB for 4K videos), ~300MB HDD
  • macOS 10.11 (or later), Intel x64, 4GB RAM (8GB for 4K videos), ~300MB HDD


The same configuration is valid for all the products of the Liquivid.

Pricing of Video to HTML5 Converter

The only drawback of the free trial is, it will add the watermark on the output file. Rest of the features will work as usual. So, if you want to remove that watermark and use the tool for commercial use, you can buy the license which just cost $19.99.

Conclusion

These were all about how to convert video to HTML5 free. Although for commercial use you need to pay some amount but spending $19.99 for lifetime use is very cheap. Try downloading the software and check the different features.

How To Convert a Video From One Format To Another & Manage It

By Ashutosh Jha → Friday, November 10, 2017
Have you ever felt of issue while running a video in your device? Yes, we encounter such issues very frequently. So, we need some device, a way through which we can convert a video from one format to another.

There can be various reasons behind this video conversion like-
  • Size is more and you need a version with smaller size
  • Your device doesn’t support the format you have
  • Usually, lighter version is preferred while using videos for marketing use
  • You need to edit the videos for further use and many others
No matter what is the reason for which you are looking for a tool which can manage your videos, create video for you, edit it, and transform it, you need a video converter.

Recently, I tried one of the leading video converters in the industry Wondershare Video Converter Ultimate and was impressed with the performance.

In this post of how to convert videos from one format to other, we will review Wondershare Video Converter Ultimate. We will also see how this is solving your need and the features of Wondershare Video Converter Ultimate.

Wondershare Video Converter Ultimate Review

Wondershare Video Converter Ultimate is another stunning product by the parent company Wondershare. They are known for developing several such products which have gone viral. Here are some of the other products by Wondershare which you might have used-
  • Photo editing tool
  • DVD builder
  • Photo & Data Recovery software
  • Office applications and many others
In this post we will be majorly focusing on Wondershare Video Converter Ultimate features and how it is helpful for you all.

No matter you are a digital marketer or a person who is video lover, you are going to love this video converter.

The famous tools in the web community like dr. fone, filmora, pdfelement are introduced by Wondershare only. These are doing amazing in the market and solving the daily problems.

Wondershare is a China-based company serving the users of 150+ nations with its products and services. Started in 2003, the company has grown exponentially and has bagged multiple awards including the Deloitte’s “Technology Fast 500 Asia Pacific 2009”.

So, you can estimate how reliable they are. Also, Wondershare provides excellent service both in terms of technical and application related support. You can get in touch with them whenever you require.

How to get started with Wondershare Video Converter Ultimate?

To start with Wondershare Video Converter Ultimate, you first need to download the software and install it. You can download it from the below link as per your operating system. Currently, it is available for Windows and Mac operating systems.

Download Wondershare Video Converter Ultimate Here

Once downloaded, you can install it like any other software and you will get a welcome screen like below.

Here you will get different options which are self-explanatory. If you want to convert any video, just browse through the option Add Files and select the file you want to convert.

Once done, you will have the file loaded and available for different action like below. You will find an option to convert at the bottom which you can use to convert that video in the other format. Also, if you have added multiple files, you can select all and convert all at once. Like this you will be able to convert any video format to others including MPEG to MP4.

There are additional options to merge all the files you have added. To do this, just slide the slider available in the above screen.

You can also import the videos from any specific URL that means internet. Just use the next option and share the URL of that video as shown below.

Now as you know how Wondershare Video Converter Ultimate works, let’s see some of its features.

Wondershare Video Converter Ultimate Features

Here are some of the amazing features of the Wondershare Video Converter Ultimate which you should know. These will help you use the tool more efficiently.

Let’s start and look into the features of the Wondershare Video Converter Ultimate-

HQ & High Speed Video Conversion to Any Format

The video conversion format available with Wondershare Video Converter Ultimate is more than 100 with 30x speed. Also, you can convert the video for multiple devices.

Easy to Use Video Editor

As said above, you can’t only convert but also you can edit your videos for better work. You can customize home movies through advanced editing features and get professional-looking works in minutes. Here is some of the editing you can do-
  • Add watermark
  • Trim & crop video
  • Add subtitles
  • Apply different effects

Save Videos From Over 10k+ Sites with One Click

Download or record your favorite 4K/HD videos from video sharing sites like YouTube, Dailymotion, and more for enjoyment without Internet connection. You can also convert those as per your need.

Create DVDs

Wondershare Video Converter Ultimate offers powerful DVD toolkit of Video Converter Ultimate that helps you to create and edit DVD files in an easy way. Here are some of the operations you can do-

Transfer Videos to External Devices

You can also transfer media files to different devices of different operating systems like Apple devices, Android devices, USB flash drives or external hard drivers easily. Also, if the system will find any file which is unsupported in the destination device, the software will automatically into the supported format.

Video Toolkit

Not only the above but the software also offers a set of full-fledged tools to help you better with video operation.

You can also check the below video for better overview of how to use this tool.


Wondershare Video Converter Ultimate Pricing

The pricing plan offered by Wondershare is very flexible and starts at $39.95 per year and increases as shown below. You can select the plan as per your team size and uses. Also, the company offers lifetime free upgrades and support.

All these plans comes with the following benefits-

Wrapping it up!

This was all about how to convert one video to other formats in high quality and faster. Wondershare offers amazing software to do all these.

Hope you got a good idea on how to use Wondershare Video Converter Ultimate brilliantly. Do try the software and share your experience with us.

WinX DVD Ripper Platinum Review: Rip Any DVD in Blazing Speed

By Ashutosh Jha → Tuesday, May 16, 2017
DVD lovers! Today I bring you a high-quality DVD Ripper tool that can help you rip any DVD and convert it to the video formats you want in the fastest speed, for editing or playback on your devices such as latest iPhone, Android and much more!

If you want to take your DVD movies with you on the road, or just want to copy main/full title content of DVD for backup, then WinX DVD Ripper Platinum can handle the job for you easily.

WinX DVD Ripper Platinum Review

I came across this DVD converter tool and found it a great tool for its ability to quickly and easily rip virtually any DVDs, including 99-title DVDs, scratched DVDs and workout DVDs. By selecting the preset output profiles for video formats and portable devices, you can backup your favorite DVD discs to ISO image/MPEG-2 file with lossless quality; convert DVD to MP4, AVI, TS, iPhone, iPad, Google, Windows devices, Sony, Xbox, etc. in one click.

The best part is, with the support for Intel QSV and NVIDIA (CUDA) NVENC based Hardware Acceleration, etc. technologies, WinX DVD Ripper Platinum increases your DVD ripping speed impressively. And you’re able to adjust it depending on your situation.

About WinX DVD Ripper Platinum

WinX DVD Ripper Platinum is widely-known DVD ripping software developed by Digiarty Software, and the tool is frequently updated to support new DVDs and technologies.

With 11 years of experience in the industry, Digiarty is now a leader in personal and home-use video audio applications based on Windows and macOS. It provides fast and easy-to-use DVD ripper/copier/creator, video converter, online video downloader, media player, iPhone file manager, video audio streaming app, etc.

WinX DVD Ripper Platinum is available for both Windows and Mac operating system. In this post, I will fully review WinX DVD Ripper Platinum on Windows and I will guide you how to rip a DVD to the video formats.

Rip DVD is Easy with WinX

This DVD Ripping software easily reads all kinds of commercial/homemade DVDs with seconds. Then you just select your device profiles, such as iPhone 7/7Plus, Samsung, Huawei, Microsoft WP8, etc. or choose Web Video profiles like YouTube, Facebook. To boot, you can rip to MP3, AAC music as you like. It has built-in 350+ profiles for you!

Backup DVD with Lossless Quality

It’s impressive that you can copy your DVD in 4 unique modes with WinX DVD Ripper Platinum. Clone DVD to ISO image, DVD to a folder at 1:1 ratio. Backup DVD main title or full title content with all videos/audios/subtitles. You’re able to enjoy the output DVD video with lossless quality.

Boost DVD Ripping Speed

WinX enables you to utilize hardware acceleration to speed up DVD ripping process. You can also set Multi-core CPU (up to 8 cores) and use Hyperthreading technologies to enjoy the blazingly fast speed. You just set the output format, run it, and then the software will process it for you automatically.

Supported Formats

Supported Input DVD File: DVD disc, DVD folder, ISO image file

Supported Output: General Formats: Built with 320+ Video/Audio Codecs, support AVI, MP4/H.264, MOV, AVC, MPEG, WMV, MTS, M2TS, TS, MPEG4, FLV, M4V, ISO image, DVD folder, MPEG2 (DVD), Chromecast, etc.

Portable Devices: Apple (iPhone, iPad, Apple TV, iTunes, etc.); Android Mobile/Pad (HTC, Samsung Galaxy, Huawei, etc.); Microsoft (WP8, Nokia, XBOX, etc.); Sony (PSP, PS4, etc.) and other devices.

Audio and Other: MP3, AAC, AC3, PNG

How to Rip DVD to the Format You Want?

Here are some simple steps for you to rip your DVD to the format you want using WinX DVD Ripper Platinum. To get started with the software, you first need to download and install in on your computer.

Step 1: Add your source DVD disc

Launch WinX DVD Ripper Platinum, click “Disc” icon to select your DVD disc, and click OK to load the DVD content.

ISO Image and DVD folder are also available to be ripped.

Step 2: Choose your output format

After loading, all DVD titles will be listed and the main titles will be automatically detected. Meanwhile, the output profile window pops out. Then you can select the profile type and choose your device or format.

Here I choose iPhone 7 as an example, so I just need to click “Apple device”, select the recommended iPhone 7 profile, and click “OK”.

I want to note that the software provides detailed output format profiles, so you don’t have to wonder what format your device should use. And the profiles are categorized for you, so you can easily find yours easily:

  • Recently Used Profile
  • General Profiles (MP4, AVI, iPhone/iPad, Android phone/pad and etc.)
  • DVD Backup Profile
  • Device Profile (Apple device, Android pad, Android Mobile, Microsoft device, Sony device and Other devices)
  • Web Video Profile (YouTube video, Facebook video, Vimeo video and General web video)
  • Common Video/Music Profile (PC general video, Mac general video, to music, TS video)

Step 3: “RUN” it and it’s done!

Just click the “RUN” button and the ripper will start the process for you!

Besides, you can make personal settings as you wish. Click the “Edit” button for the main title and you can trim to make a video clip. Crop and cut off unwanted area of the movie, and add external subtitles. Also, you can set tag info and change the destination folder.

Wrapping Up

WinX DVD Ripper Platinum impressed me for its powerful and fast speed. It tackles DVD ripping effortlessly and makes the steps simple. Just in 3 steps, you can get your DVD movies digital formats and enjoy them on your device. Now download WinX DVD Ripper Platinum to rip/backup your own DVDs easily!

How to Set Up a Great YouTube Office for Video Production

By Ashutosh Jha → Wednesday, December 12, 2018
Creating YouTube videos is so much more than video editing or after effects. If you don’t have great footage, to begin with then all the editing and promoting in the world cannot help you. Thankfully, setting up a great studio for yourself is not out of reach or out of budget. You can have a great set-up with ease right from the start, but you will need to prepare this space for the future. Invest correctly, choose correctly, and all your money will go towards building up a successful and powerful digital brand:

Clean Up the Space and Organize It

If you have a lot of items that you need to be stored away, then forget hiding it in nooks and crannies and instead put it all out in the open in a heavy duty strong storage system from G Rack. This way you can store everything you need, from video equipment, to sound equipment, to even props and other necessary items in one place. As it is all out in the open, you will easily be able to see what you have and what you can use. Just remember to keep it out of sight from your shot.

Also Read: How to host free webinar using YouTube?

Create a Fun Backdrop for Video

A fun backdrop can add some interest and most importantly make you memorable to the eyes of your viewers. It could be a bunch of posters; it could be books, it could be string lights – whatever suits your brand image. Just remember to put it up on a flat wall that is well positioned for your video set-up.

Set up Your Lights

One of the big differences between professional and amateur video is the lighting. Get studio lights, for example, and set them one up on each side of your face and you can be well lit, easy to see, and above all else look like you are one of the professionals. Versions of these lights are not particularly expensive nowadays either and can be easily budgeted for.

Create a Productive Office Space Area

Having a great studio set-up is step. The next will be to create a productive office space so that you can commit to editing, marketing, and all the other necessary digital components of your online brand. It should be well organized, clean, and easy to concentrate. You want to be productive on a regular basis, so if you keep getting distracted by something remove it. The only way you will become a success is if you commit to the work and aim to grow your account every day.

Never underestimate the physical space when it comes to creating a successful YouTube channel. You need to have a great backdrop, have a well-lit area, and of course a solid video and sound recording set-up in order to succeed. Finish it all off with a productive office space, and you can really get into the process. With a touch of luck you could even become a huge hit online.

Leawo Blu-ray Ripper - Best blu-ray ripper to Rip and Convert Blu-ray

By Ashutosh Jha → Friday, February 14, 2025
Are you looking for a program or software to rip blu-ray discs or DVDs to a hard drive? Then you need a good blu-ray ripper tool to do this for you. Although there are dozens of software available in the market to do this work for you, usually you will face issues like compatibility to your system, not working properly, etc.

Recently, when I was discovering such tools, I came across Leawo Blu-ray Ripper that has done the work amazingly. In this article, I am going to review Leawo Blu-ray Ripper and share my experience using it.

What is Leawo Blu-ray Ripper?

Leawo Blu-ray Ripper is a Blu-ray ripper product from the product suits of Leawo especially designed and developed for Mac and Windows. It is one of the best Blu-ray rippers available in the market to rip Blu-ray/DVD and convert Blu-ray/DVD to MP4/MKV/MOV/WMV/FLAC/MP3 formats. It also supports additional audio and video file formats as required.

Features of Leawo Blu-ray Ripper

  • Convert Blu-ray/DVD to video/audio files in 180+ formats (such as converting blu-ray to MP4, MKV, WMV, MOV, MP3, FLAC)
  • Remove Blu-ray/DVD disc protection and location restrictions
  • Convert Blu-ray/DVD contents you need only; you don't have to convert everything, just select what you need and convert
  • Converts subtitles and audio tracks as well
  • Convert 2D Blu-ray/DVD to 3D video in 6 different 3D effects, with 3D depth adjustable

Now let’s start and look at some of the amazing features in detail -

#1 Convert Protected Blu-ray Discs

Leawo Blu-ray Ripper contains disc decryption and protection removal function. You can decrypt, rip and convert blu-ray discs with BD+, AACS, and the latest MKB protection, as well as CSS-DVD discs. Leawo Blu-ray Ripper is a good choice for you to remove blu-ray disc protection.

#2 Convert 2D Blu-ray to 3D video and apply various 3D effects

With Leawo Blu-ray Ripper, you can convert 2D Blu-ray/DVD to 3D videos and use it for various use cases including YouTube channel, sharing with others, business uses, etc. You will also have 6 different options for 3D movie effects including Red/Cyan, Red/Blue, Red/Green, Blue/Yellow, Interleaved, Side by Side.


#3 Amazing video editing features

With this feature, you can edit Blu-ray/DVD videos before you convert them, saving a lot of time and resources. The features include trimming of videos, cropping, removing black margin, adjusting video effects, setting brightness, and many more. You can also adjust audio and video output parameters like codec, bit rate, frame rate, resolution, aspect ratio, etc. for an amazing end product. You can also take a backup of the original file in case you need it further.


How to install Leawo Blu-ray Ripper on Mac/Windows

You should start the software by downloading it from the official website and the entire process takes ~120 seconds to complete. Depending on the device you are using, it will download the suitable version (for mac and windows)

Once it is downloaded, with a few clicks, you can install it and start using it. Once it is installed, it will ask you to either start a free trial which offers you ripping of 5-minute clips or you can go for the paid version which starts at $44.95 for a year. There are other plans as well but I personally prefer the lifetime plan which comes at $99.95 only.


How to use Leawo Blu-ray Ripper on Mac/Windows

After the installation and purchase, you will be redirected to a screen something like below. There may be a slight change in look & feel depending on the operating system you are using.


As you can see, I have clicked on the convert tab and this gave me a few options. Depending on your requirement, select one and proceed.

Once you have selected a file to rip, it will ask you to select the output profile. As you can see in the image below, quite a lot of options are available and depending on your requirements, you should select one.


3rd step will be to select the output path where you want to save the converted video


And finally, once you click on the convert button on the previous screen, it will start converting Blu-ray.


That’s it! It’s a simple 4 step process and depending on the size of your input file, it will take some time to finish.

Conclusion:

This was a quick review of the amazing tool Leawo Blu-ray Ripper. If you are in need of a video ripper tool, you should definitely try this one. Even with the free version, you get to review and explore the tool and once you are convinced, you can go for the paid plan. If you have used this tool earlier, feel free to share your experience with us.