Browsing "Older Posts"

Browsing Category "WordPress Plugins"

5+ Best WordPress Autoblogging plugins for Content Curation

By Ashutosh Jha → Saturday, January 2, 2021
WordPress autoblogging plugins help us to keep our blog and website refresh and keep it growing. Many times we face this issue that we don’t get much of the time to maintain the blog and you should be ready to maintain your blog when you are busy.

However, it is not that easy to create fresh content every day and especially when you’re too busy. Another issue is that, many of us can’t afford freelance writers to write the new content and if we can also, there is no guarantee that it will be of the high quality that we expect from our blog.

WordPress Autoblogging plugins

Recently I have started a niche blog (I’ll write the case study as for how it will perform further) and have hired a girl for the content. She is delivering the content on time but not getting the quality that I expected and so have to spend much of the time to edit that article. So another approach to this is the WP Autoblog plugin.

WordPress auto content generator can help you in such a scenario. This WordPress autoblogging plugin allows you to generate free content for your blog.

Top WordPress Autoblogging Plugins

So here are the top WordPress autoblogging plugins for you to create fresh content for your blog and website. Some of these WP Autoblog plugins are free while others are paid and you’ll have to pay to have those plugins.

1. WP RSS Aggregator - FREE auto blogger plugin

WP RSS Aggregator is considered as one of the best autoblogging WordPress plugins and is completely free. This plugin is used for importing, merging, and displaying RSS and Atom feeds on your WordPress site.

WordPress Autoblogging plugins

With this free core version of WP RSS Aggregator, you’ll be able to aggregate as many RSS feeds from as many sources as you'd like. The most important feature that I liked about this autoblog WordPress plugin is, it is highly customizable. You can arrange the feeds as per your need.

Here you can select the feed time interval and can also open the external links in the new tab and much more.

Here are the few amazing features of WP RSS Aggregator-

• You can always export a custom RSS feed depending upon your feed sources.

• It allows you to display your imported feed items with the help of a shortcode.

• You can set the name of the feed source along with the features like pagination, date format, and links as well.

• You’re allowed to limit the number of feed items in the database.

• It also can open video websites like Daily Motion, YouTube, and Vimeo directly on your blog.

• I guess the above features are enough for you to choose this plugin and if not, then here are some of the add-ons available for it.

• Categories – This add-on allows you to show your content in an organized way and according to the category you wish to show first.

• Full-Text RSS Feeds – It connects you to the Full-Text premium service and hence you get unlimited feed items for every single feed.

• Keyword Filtering – As the name suggests, it imports the feeds as per the keywords set by you.

• Excerpts and Thumbnails – It clear by the name, the add-on shows excerpts and thumbnails with the title, date, and source as well.

2. FeedWordPress – FREE auto blogger plugin

FeedWordPress is another free autoblogging WordPress plugin and can be helpful to create free content.
WordPress Autoblogging plugins

FeedWordPress is an Atom/RSS aggregator for WordPress. It syndicates content from feeds that you choose into your WordPress weblog; the content it syndicates appears as a series of special posts in your WordPress posts database.

The best thing that I liked about this free autoblog plugin is, here all the incoming categories will be turned into tags and if there is any new category, the system will automatically make it a new tag.

3. WPeMatico - FREE auto blogger plugin

If you’re looking for a decent and easy to use WordPress autoblogging plugin, I would suggest going with WPeMatico. This is quite a decent and very easy to use with lots of customization available.

WordPress Autoblogging plugins

This plugin also offers you a nice interface like the default WordPress to manage all the feeds you import. Here you can import feeds from multiple sources and can arrange as per your need so that it can look better.

4. WP Robot – Premium auto blogging plugin

WP Robot is one of the best WordPress auto content generators but it is a premium autoblogging plugin. Though it is a paid one, believe me, every penny of its worth. You will clearly identify the difference between the free autoblog plugin and the paid one in terms of quality, in terms of ease of use, and much more.

WordPress Autoblogging plugins

You can use this plugin with any WordPress theme and with any version. Another important feature of WP Robot is, you can insert your affiliate links in the content. Currently, WP Robot supports more than 20 affiliate links including Amazon, eBay, and much more.

A Complete Guide on Blog Post Interlinking

By Ashutosh Jha → Tuesday, February 4, 2020
Many of us just run behind making backlinks here and there and usually don’t much focus on interlinking blog posts. There may be plenty of reason behind this like you don’t know why you should interlink blog post or why you should do internal linking and what are the benefits of blog post interlinking.

Blog Post Interlinking

So if you are among the above or want to know how to interlink blog posts, then this article is for you. Here I am going to share each and everything of Blog Post Interlinking.

Let me quickly summarize, what all I am going to cover in this post-

1. What is blog post interlinking?
2. Benefits of Blog Posts Interlinking- Why you should interlink blog posts?
3. How to interlink blog posts in Blogger and WordPress

That means I am going to cover each and everything about Blog Post Interlinking. But before that let me ask a simple question-

How to increase Upload Limit of All-in-One WP Migration Plugin

By Ashutosh Jha → Sunday, December 1, 2019
All-in-One WP Migration Plugin is one of the best WordPress plugins for WordPress website migration. It allows you to export the backup of the existing WordPress website and then import it to somewhere else.

But the problem is, All-in-One WP Migration Plugin free version allows a limit of only 128 MB size which is too small for any site. Even for a small WordPress site, the file size will be around 200-400 MB.


As you can see from the above screenshot, the maximum limit for file upload is 128 MB only. This can vary from version to version of All-in-One WP Migration Plugin.

And even for a small site, this is not enough and if you’ll go with the premium version then you need to buy it.

If you don’t want to pay for this, then this article on How to Increase Upload Limit of All-in-One WP Migration Plugin is for you.

By this time, I assume that you have already taken the backup of your site and have installed WordPress on some other platforms like Google Cloud, Digital Ocean, etc. You may also check how to start a WordPress site from scratch to understand more.

The requirement to increase Upload Limit of All-in-One WP Migration Plugin

To increase the upload limit of All-in-One WP Migration Plugin, you should have the plugin version 6.77 or lower. You can download the lower version of the plugin from here.

Note: Some platform allows this plugin by default. And so, if that is already installed and even though you will install the version 6.77, still it will create the new version. To avoid this, you need to delete the file related to All-in-One WP Migration Plugin from the folder and then install the version 6.77 or lower.

How to increase Upload Limit of All-in-One WP Migration Plugin

Once you’ve ensured the above steps, it’s time to increase the upload limit of All-in-One WP Migration Plugin. To do that, please follow the below steps-

Step-1: Activate All-in-One WP Migration Plugin

From your WordPress admin dashboard, follow Plugin → Installed Plugins → All-in-One WP Migration Plugin → Activate


Step-2: Open Plugin Editor interface

Again go to the WordPress admin dashboard and follow Plugins → Plugin Editor


Step-3: Select the All-in-One WP Migration Plugin

At the top right corner, you will find an option for the selected plugin to edit. Select All-in-One WP Migration Plugin from the drop-down and then click on the select button.


Step-4: Open constants.php

Here you will find all the files related to the plugin. From the files, please select constants.php.


Step-5: Increase Upload file max size

Here go for line number 249. This may change from version to version as well. In that case, search for the term “Max File” and you will find lines something like below-


We have added that 20 to it as a multiplication factor. This will increase the max upload file size is 10 GB. If you need even more, just increase that factor (which is 20 here). Once done, please save the changes.

Step-6: Check the changed new max file size

Just to ensure that the changes have taken place, please follow again dashboard → All-in-One WP Migration Plugin → Import

Here you should find the updated maximum file upload size.


Conclusion

These were all about how to increase the Upload Limit of All-in-One WP Migration Plugin. This way you can import the bigger file as well without paying a single penny. Do try this and if you find any issue, please comment below and will solve your issue.

If you’re a tech-savvy guy, you may make changes directly by accessing the constants.php file from the file directory. You can find constants.php file by following the below directly- /wp-content/plugins/all-in-one-wp-migration/constants.php

How to start a blog on UKHost4U in 5 Minutes- Step by Step Guide

By Ashutosh Jha → Monday, November 4, 2019
If you’re looking to start a WordPress site with cheap and reliable hosting, then this article is for you. Here I am going to talk about how to start a WordPress blog on UKHost4U in less than 5 minutes.

I will be sharing the exact method I have used while hosting one of my new domains and you can do so just by following this guide.

UKHost4U review

Before going into the step by step method to host WordPress blog on UKHost4U, let's talk little details about the company.


UKHost4U is one of the leading hosting providers across the globe, especially in the UK region. They have all kind of hosting available like-

  1. 1. Web hosting
  2. 2. WordPress hosting
  3. 3. Enterprise Hosting
  4. 4. Reseller hosting

So, depending on your needs and budget you can select any of these.

Along with the above, they also have the server and you can buy-

  1. 1. VPS server
  2. 2. Dedicated server

UKHost4U is an all-in-one web solution where it offers domain, VoIP, and security solutions like SSL certificates as well.

If you follow TricksRoad, you must be knowing that I keep on trying different hosting companies from time to time. Earlier I was on DreamHost (check step by step guide to host a blog on DreamHost) and later I tried HostUpon, BlueHost, and Namecheap as well.

Recently, when my existing hosting was getting over, I started looking for some other hosting providers. I talked to multiple hosts like A2Hosting, PowerUp Hosting, Digital Ocean, UKHost4U, and Orange hosting. After going through all, I found UKHost4U matching the kind of requirement I had.

While selecting the best WordPress hosting, the following were the major parameters I focused on-

  • Uptime
  • Cost-efficient
  • Better Support
  • Free SSL
  • cPanel
  • Unlimited traffic
  • Free site transfer

When I talked to almost all the hosting mentioned above, I found UKHost4U satisfying all these factors and I have decided to go ahead with them.

UKHost4U Features

Here are some of the amazing features of UKHost4U which attracted me to buy and you may also look for these-

1. Free Site Migration

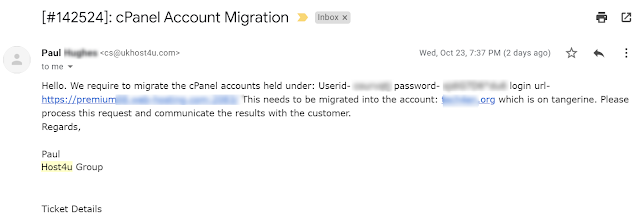
If your existing hosting uses cPanel, just open a case with their support and be sure of the smooth migration. I opened a case with them on Oct 23 just by sending an email with the details like cPanel URL, user id, and password of existing account.

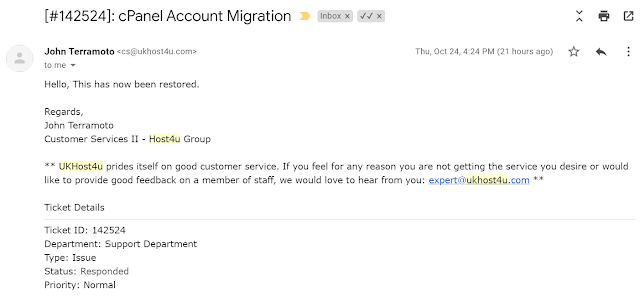
And within a day, all my sites (7+ WordPress blogs and sites) were transferred to the new hosting. Below is the email confirmation from their support team.


2. 24X7 Technical Support

This I found interesting!

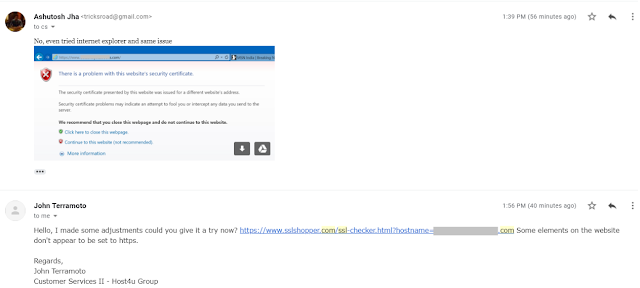
If you'll look into the major hosting providers, they usually provide chat support for sales. But UKHost4U provides 24X7 support for technical issues. And this is very helpful. I felt some SSL related error with one of my sites and within no time, they resolved it. You can see the response and resolution time from below email screenshot-


3. Free SSL Certificates

This is another feature for me to consider. My last hosting provider Namecheap had this limitation. Although Namecheap allows 50 free SSL certificates but it will be only valid for 1 year per domain and from next year you will have to buy. But UKHost4U is different here and allow free SSLs as long as you will be with them.
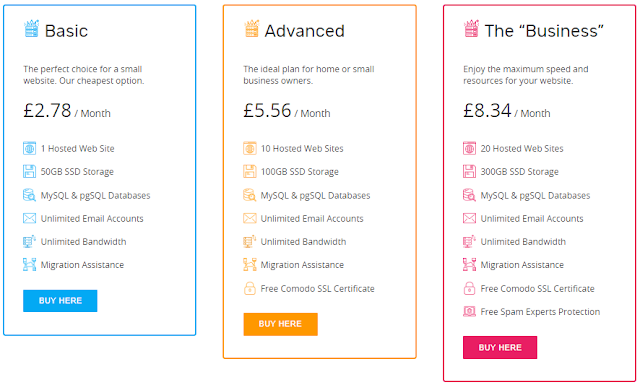
4. Flexible Plan

Another great thing about UKHost4U is, they have different plans to suit everyone's needs. Here are the three major plans by UKHost4U which you can check-

And similar to this, there are many other features of the hosting that you can check form the above pricing table.

Along with all these, UKHost4U allows 30-days of money-back guarantee. The company is in service since 2001 and had got 4.6 average ratings on Trustpilot.

How to start a WordPress blog with UKHost4U step by step

Here is the step by step by step guide to starting WordPress blog with UKHost4U. We will go through section from buying the hosting to making the site live.

Section-1: Buying hosting

Head over to the site and looking for the different hosting plans with cPanel. I personally recommend hosting with cPanel as it is standard across the industry. Also, managing and transferring are a lot easier with cPanel.

You can check the different UKHost4U hosting plans here. Now depending on how many domains you are looking to host, select from the plan. As I had 12+ domains and so I selected "the business" plan which offers to host up to 20 websites. It comes at 8.34 Euros per month.

Tip: You must check with them for the offers and there is a high chance that you can get around 10%-20% discount easily. You can either wait for the popup box or can ask in the chatbox as well.


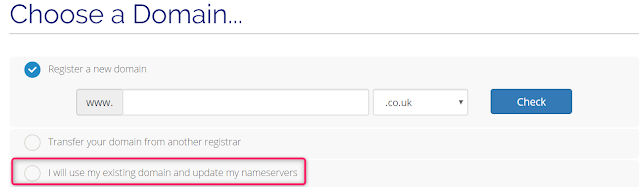
Once you will click on the buy here button, you will be redirected to a new page where the system will ask for the domain options.


As I was already having the domain name with some other cheap domain name registrar and so I selected the third option where I just need to update the Nameservers.

Just put your existing domain name here and click on the use button.


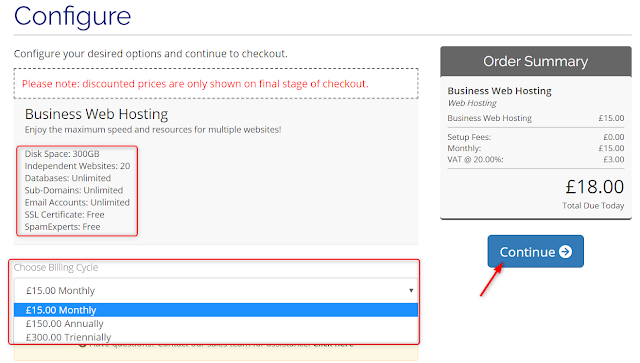
Next, it will show the configuration page where you can select the plan and make the payment.


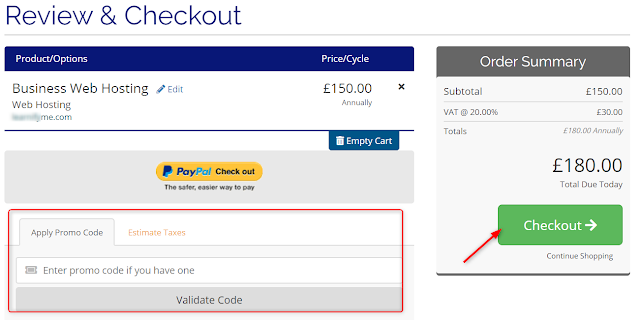
Just click on Continue in the above window. This will take you to the payment page where you can apply the coupon code as well.


Once done, just click on the checkout button and make the required payment. In the checkout page, you'll be asked for some personal details like email id, password, etc. Just fill those and make the payment. Once done, you'll get the confirmation email.

That's all, you have successfully bought the required hosting and can log in to your account using email id and password.

Section-2: Change Nameservers to Existing Domain

As we selected, the 3rd option to change the nameservers to the existing domain and so we need to change the nameservers of the domain.

To do that, just log in to your domain registrar and make changes to your nameservers. If you have the domain on GoDaddy then you can sign in to your account and select DNS option.

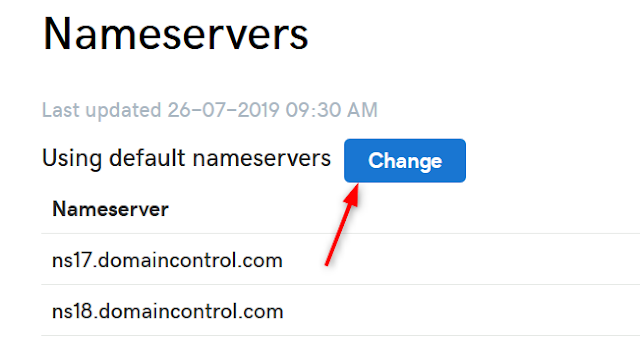
This will take you to a new page wherein the lower section you'll find Nameservers section.

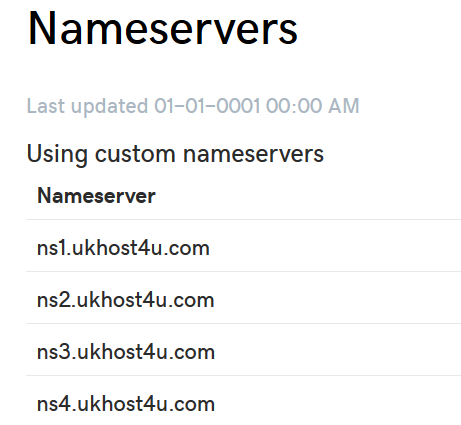
Just click on change and add the following nameservers so that your domain can point to UKHost4U.


  1. 1. ns1.ukhost4u.com
  2. 2. ns2.ukhost4u.com
  3. 3. ns3.ukhost4u.com
  4. 4. ns4.ukhost4u.com


Once you have changed the existing domain nameserver, you need to wait for some time for the change to take place. Finally, it should look like below-

Section-3: Install WordPress on UKHost4U Hosting

Now we are all set to install WordPress on UKHost4U Hosting. For this, we need to access cPanel. Please follow the below steps to do that-

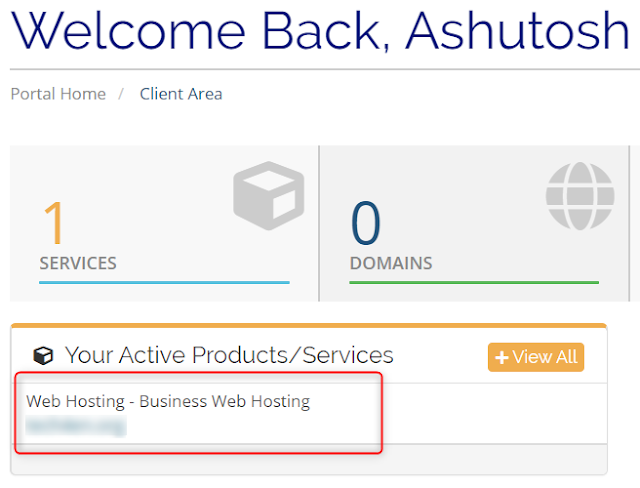
Step-1: Login to your UKHost4U account and you will get the dashboard something like below-


Step-2: Click on your product and you will be taken to a new page which will be like account details with various useful information like- link to cPanel, Email accounts, disk space, file manager, databases, etc.


Step-3: Click on login to cPanel to access cPanel. This will take you to cPanel and here you can add new domains or create a new email account or directly install WordPress if domain is already added.

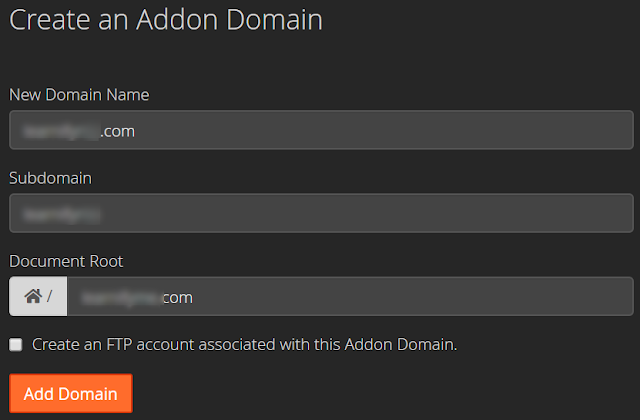
Step-4: Let's add a new domain name here. For this, just scroll to Domains section and select addon domains


Step-5: Just add your domain name click on add domain. Make sure your domain nameserver is pointing to UKHost4U.


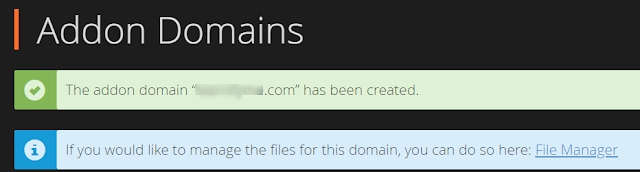
If the domain will be added successfully, you'll get a successful message like below.


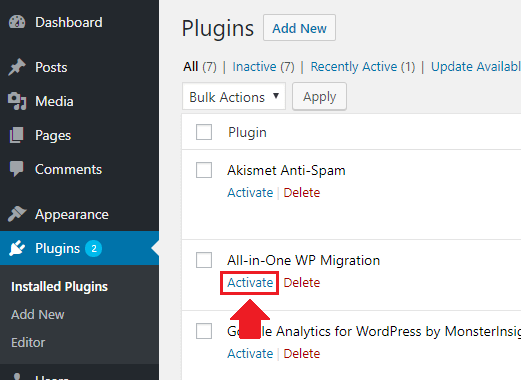
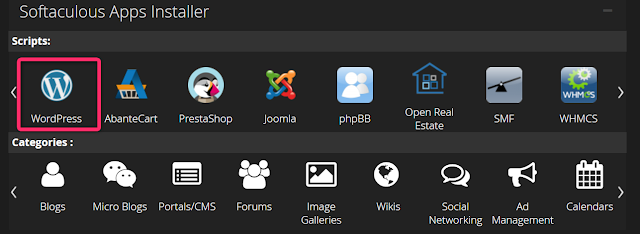
Step-6: Now move back to the cPanel home page where we'll install WordPress. Just look for the Softaculous Apps Installer section and select WordPress from the list.


Step-7: Here click on "install now" button to install WordPress


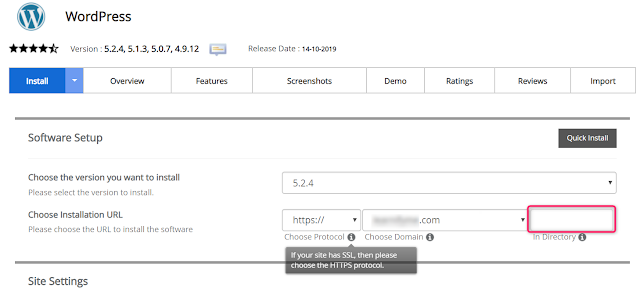
Step-8: In the next step, we need to select the domain name on which we have to install WordPress along with other details like the name of the blog, and some configuration details.


Note: Please make the highlighted section empty else WordPress will be installed on domainname.com/dir/. If you want to install WordPress directly on domainname.com then simply leave that field empty. Just fill the required details and at the end of the page, you will find the install option. You may also select the theme and can get the notification of installation by putting your email id.


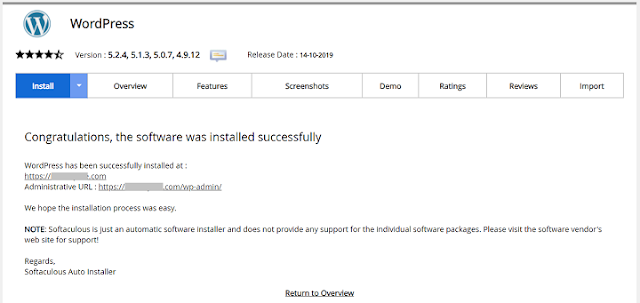
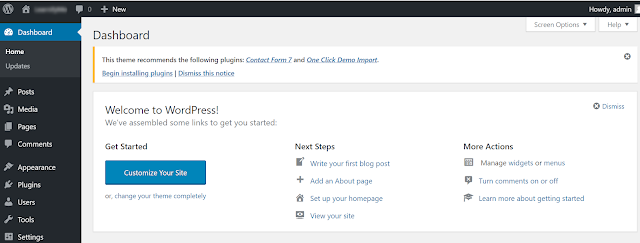
Step-9: Once the installation will be done, you'll get a successful message with the admin login information.


Step-10: You can now login to your WordPress admin and customize it as required.


All done now!

You've successfully installed WordPress on your domain. Now you can use any new WordPress theme or can add the required WordPress plugins as required. You may also want to check what kind of websites you can create with WordPress.

Section-4: Create a Professional Email

It's always good to keep your email professional. A professional email is nothing but a domain-specific email. For example, for this blog TricksRoad although I use Gmail id much but have professional email like ashutosh@tricksroad.com which I use for business communication.

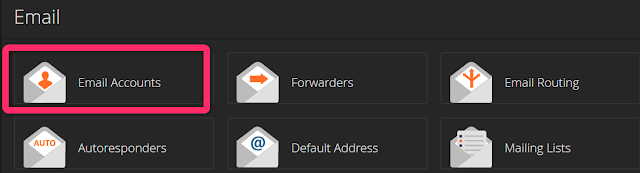
You can create such professional emails from cPanel. Just go back to the cPanel home page and look for the email section and select Email accounts.


This will take you to a new page where you can create a new email account as shown below-


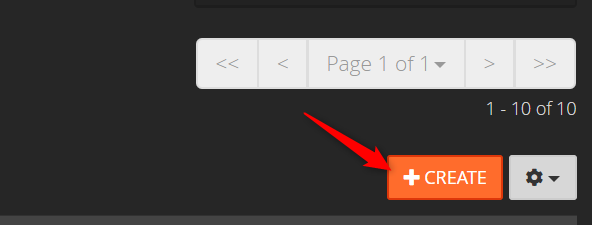
On the next page, you need to select the domain name for which you want to create the email. Followed by the email id you want to choose, password, and space you want to allocate.


Once done, simply click on the create button, it will be created. Now just look for the email id and you will find link to access the email.


All done by now!

We have successfully bought the required hosting, installed WordPress, and created email id for the required domain name. Just follow these steps and you'll be able to start a WordPress blog in minutes.

Conclusion

This was all about how to start a WordPress blog on UKHost4U hosting in less than 5 minutes. If you're looking for cheap and reliable hosting, you should definitely check them.

Also, if you experience any issue while using or have any queries, feel free to comment below.

5 Best WordPress Landing Page Plugin- Create stunning LP without coding skill

By Ashutosh Jha → Monday, December 17, 2018
We bloggers keep on writing the good post which should be attractive, impressive and meaningful. But always the content doesn’t simply work.

Best WordPress Landing Page Plugin
Most of the times you would be hearing to write the impressive content which should convince your reader to buy the product you recommend. In such cases, a landing page works much better than a WordPress page.

As you can see with a landing page, it is much easy to convert your visitor into a subscriber.
Best WordPress Landing Page Plugin
If you want your reader to take action like signing up for an offer you are promoting or buying a product you recommend, then you need a perfectly optimized landing page. I am not saying, a standard page can’t convert, but the conversion rate with the landing page is far more.

But don’t worry! You won’t have to get into the technical and coding glitches while creating a landing page.

In this article, I will show you some best WordPress landing page plugin which will make your journey to create landing page easier and without writing a single line of code.

These top WordPress landing page plugin not only help you to design great looking landing page but also provides many features for best conversion and maintenance.

So let’s get started with some of the best landing page WordPress plugins.

Best WordPress Landing Page Plugin: Top 5

Here are the five best WordPress landing page plugin for your use. You can use these plugins to design landing pages for your newsletter subscription, sales page, summary page, etc.

Top WordPress Landing Page Plugin #1 Leadpages

Leadpages is currently one of the best landing page creators. They have fully functional drag and drop landing page creator which you can host either on your server or even you can host at Leadpages server.

They too have WordPress landing page plugin which you can install at your WordPress dashboard and can add as many landing pages as you want.

Best WordPress Landing Page Plugin
It is an easy, stylish, appealing and converting landing page. One of the best things I liked about Leadpages is, you can even publish your landing page on social platform like Facebook.

It is easy to use, and if you have used any template builder with WordPress, then you can also use Leadpages easily.

All you have to do is, just drag and drop the fields and designs as per your need and create an excellent landing page without any coding skill.

Here are some of the impressive features of Leadpages-

• Over 350 landing page templates
• Mobile friendly
• Drag and drop customization
• Easy A/B testing
• WordPress plugin that makes integration easy

Leadpages is also cost effective, and many top bloggers and internet marketers use Leadpages for their campaigns and blogs.

For a single user, the license just cost $25 per month, and you will be billed on a yearly basis. You can create as many landing pages as you want with this option.

With a higher plan, you can also get the feature of A/B testing which is indeed required for the sales campaigns.

So if you are looking for a perfect solution for the landing pages, Leadpages is your destination.

Top WordPress Landing Page Plugin #2 OptimizePress

OptimizePress is another demanding and useful WordPress landing page plugin to create stunning landing pages.
Best WordPress Landing Page Plugin
Unlike Leadpages which was platform independent tool, OptimizePress is exclusively built for the WordPress platform.

Again you don’t need any coding knowledge to work with the OptimizePress, and you can just drag and drop from your WordPress dashboard.

OptimizePress also provides 30+ landing page templates which you can use and edit as per your need. By this way, you won’t have to start from scratch. Although it is far less than Leadpages’ templates but still sufficient to initiate the journey.

OptimizePress is very cost efficient and just charge $97 as a one-time fee, and you won’t have to spend anything else to use. The license can be used on three websites.

Here are some of the features of OptimizePress-

• 30+ templates
• Mobile responsive designs
• Drag and drop editor
• 40+ elements
• One-time fee – no monthly charges

If you have some subscription based business, OptimizePress can work best for you!

So if you don’t want to pay a monthly fee for creating the landing page, OptimizePress can work best for you. It is easy, effective and can create some cool landing pages.

Top WordPress Landing Page Plugin #3 Thrive Landing Pages

Thrive landing page is new but getting huge popularity in the blogosphere and online space. Thrive landing pages is a WordPress specific landing page plugin, and you can create some stylish and optimized designs from your WordPress dashboard.

Best WordPress Landing Page Plugin
Thrive also have Thrive builder using which you can design your standard pages super awesome. I am using it for one of my blogging niche sites, and the result is just super, and your website will also look better.

Thrive landing pages provides around 150+ landing page template, and you can simply select the one and start editing it as per your demand.

Here are some of the unique features of Thrive Landing pages-

• 150+ templates
• Theme template sets
• Drag and drop editor
• WordPress-specific – do everything inside WordPress
• Mobile ready
• One-time purchase – no monthly fees

It is more economical than OptimizePress and just cost $67 as a one-time fee. So far I found Thrive as most economical WordPress plugin with these many features and design.

Top WordPress Landing Page Plugin #4 ClickFunnels

ClickFunnels is not just a landing page creator, but you can say it is more of a complete choice for internet marketers with the following features-

• Landing Page
• Email Responder
• Shopping cart option and much more…

Landing page creator is a major part of the ClickFunnels tool and comes up with a WordPress landing page plugin to manage all of your need.


Best WordPress Landing Page Plugin
Here are some of the excellent features those ClickFunnels provides-

• 40+ templates
• Drag and drop WYSIWYG landing page builder
• Email autoresponder software
• WordPress plugin
• A/B testing
• Full sales funnel support and much more…

Their video tutorials will help you a lot to set up the landing pages and other features easily, and in the case of any further issues, you may contact their support team.

The only drawback I found with ClickFunnels is the price. It is a bit costly compared to other Wordpress landing page plugin and comes at $97 per month.

But as many other features are also incorporated into the tool, so this price can be justified for those who uses all the features.

ClickFunnels also provides 14 days of free trial, and anytime you can switch to the premium plan.

Top WordPress Landing Page Plugin #5 Ultimate Landing Page

Once a blogger thinks of starting with the landing pages, the Ultimate landing page is among the first few they try. It is a fermium WordPress landing page plugin specifically available for the WordPress platform.
Best WordPress Landing Page Plugin
You can start with the Ultimate landing page free and is a great landing page WP plugin for beginner to start with.

Once you want to switch to the advanced version, just pay $27, and you will get access to all the advanced features.

It also provides some basic but good landing page templates which you can use and edit as per your need. Although it has not many features as other landing page WordPress plugin still an ideal choice to start with.

Which is the best WordPress landing page plugin?

The above listed top 5 WordPress landing page plugin will be very helpful if you are considering your blog as your business.

It helps you to optimize your newsletter, subscription, sales pages and any other money making pages for better leads and conversion.

If you are just looking for the landing page that can be used with WordPress, then Thrive landing page can be the best option.

But if you are an internet marketer who creates the landing page for your sales funnels as well, then I would suggest you go with Leadpages. Hope this list of best WordPress landing page plugin will help you to create a sales funnel.

I would love to know which landing page creator you are using.

7 best WordPress speed plugins to Speed Up Your Blog

By Ashutosh Jha → Wednesday, September 26, 2018
Plugins allow you to add functionality and features to your website. They are a piece of software that can help your website to perform more efficiently.

A plugin may vary in its complexity depending upon its functionality. Some plugins are very simple and others are complex that performs a wide variety of tasks.

best WordPress speed plugins
Image Credit: KeyCDN
You integrate various plugins into your website depending upon your need. In this article, we give you 7 such plugins that can speed up your WordPress blog.

7 best WordPress speed Plugins to Speed your WP Blog

If you use WordPress CMS then you must try following 7 best WordPress speed plugins to enhance your site’s performance.

1. WP Super Cache

WP Super Cache is one of the most popular cache plugins right now. There are more than 1 million active users for this plugin.
Salient features of WP Super cache are

  • This plugin generates static HTML files from a dynamic blog and serves to the web server instead of processing heavier WordPress PHP scripts.
  • Visitors of your site will notice no slowdown even when the server is down.
  • Super cached HTML files will be served faster than PHP generated caches files.
  • It supports multiple caching types Mod_Rewrite, PHP, and legacy.
  • It enables PHP caching, compress pages, cache rebuild, CDN support and Extra homepage checks.
  • Very easy to uninstall for the beginners.

2. WP Fastest Cache

Second best Plugin to speed up your blog in our list is WP Fastest Cache.

Actually, this plugin should be number one on our list.

It comes with all the great features and ease of use especially if you are a new user.

You just need to install, activate, run through the settings, save and you are all set to go.

There are over 300,000+ active users of this plugin.

Some of its features are-
  • Very easy to set up, unlike W3 Total Cache which needs expertise.
  • In just one click all cache files are deleted when a page is published.
  • Minify CSS and HTML
  • Admin can delete all cached files from options page, minified CSS and js files.
  • SSL support and CDN integration.

3. W3 Total Cache

W3 Total cache is a complete framework. It supports a huge variety of options and caching techniques.

Some of its most salient features are
  • Up to 10 times improvement in overall site performance.
  • An advanced support for the CloudFlare and various CDN services like MaxCDN.
  • Improved ranking for mobile friendly websites that uses SSL.
  • It is three in one. You get browser caching, database caching and object caching.
  • Improved Conversion rates and reduced page load time for the website.
  • It is compatible with shared hosting, virtual private and dedicated servers.

However, the W3 Total cache is not easy to set up because there are so many options to choose from. Hence it is only for the advanced users. But if you are a beginner and confused to setup this plugin, I will recommend you to go to Fiverr or other freelance sites and get it done at minimum cost.

4. WP Smush.it

WP Smush.it plugin is primarily designed to optimize images and remove unnecessary bytes from all the image files.

This plugin will scan every image you upload and scales them before adding it to the media library.

It also compresses all the images stored in other folders of your website.

Some other features are-
  • Trims all unused color from images and metadata from jpegs.
  • It can process all images files like JPEG, GIF, and PNG.
  • WP Smush.it works with all other plugins in the market.
  • Large image files will be automatically scaled before being added to the library.
  • Global and individual setting for multisite.
There are over 800,000 active installs for this particular plugin.

5. BJ Lazy Load

BJ Lazy Load plugin allows loading only specific elements that are needed. So instead of loading an entire page with a lot of images, it uploads only relevant parts of a given web page.

  • BJ Lazy load makes your site run faster and save a lot of bandwidth.
  • It scaled down images and videos without compromising responsive designs.
  • The plugin replaces all your images, thumbnails, gravatar, images and content iframes with a placeholder. It loads the content very fast whenever a user scrolls the page.
  • iframes also include embedded videos from YouTube and Vimeo.
  • The Plugin is compatible with the RICG Responsive images.
  • It uses jQuery to function.
Around 50,000 people have installed this plugin.

6. WP-Optimize

WP-Optimize cleans your WordPress database so it can run with maximum efficiency.
  • Removes all trash data like spam comments, unapproved comments, pingbacks, limit post revisions, trackbacks etc.
  • It will allow you to make space, take control of your website and keep it always clean. It will also show database statistics.
  • It will automatically carry out automatic cleanups weekly.
  • It performs optimization without any need for running manual queries.
  • Compact/defragment MySQL tables with just a press button.
  • Very mobile friendly plugin and easy to use.
  • It can be translated into several languages.

7. Cache Enabler

Cache Enabler saves a lot of time because it takes few seconds to set up. It creates HTML files and stores them on server’s disk.

This plugin improves the performance of your website avoiding the resource intensive backend processes.

Some of its features are-
  • Very simple set up even beginners can use it.
  • Automated and manual clearing of the cache and purging of a cache of specific pages. Just one click to clear cache.
  • Displays actual cache size in your dashboard.
  • Minification of HTML and inline JavaScript.
  • It supports responsive images and compatible with Auto-optimize.
Although there are many other plugins to speed up your WordPress blog above mentioned 7 plugins are the best one. You can also check our best blogging tools to know more about the tools we use in blogging.

Some other best WordPress speed plugin that we missed in this article is WP DB Manager, WP Super Minify, Better WordPress Minify, P3 Plugin Profiler etc.